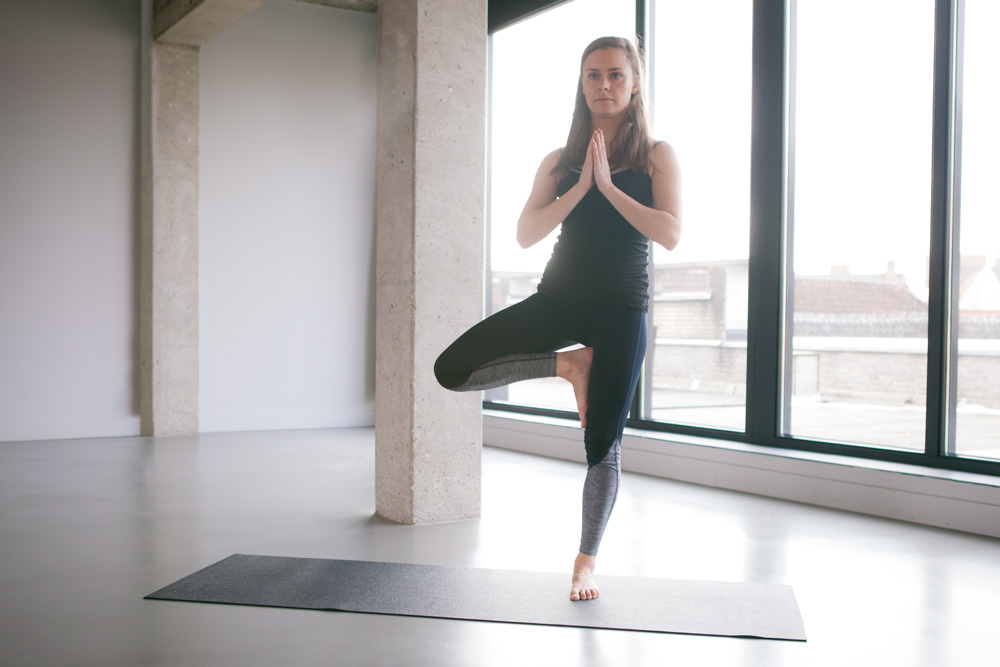
Find Your Balance In Tree Pose
In this article we highlight some of the foundational asanas. We also describe common misalignments that are useful to be aware of if you’re a yoga teacher or student.
To prevent injury it is important for students - and of course teachers - to have a strong foundation before moving on to more advanced postures. This way you will build strength and develop body awareness.
I had to balance on one foot I freaked out
Flat feet are a family trait. Besides the fact that it doesn’t look very charming it makes balancing postures very hard for me. So you can imagine that back when I took my first yoga class ever and I had to balance on one foot I freaked out.
I saw all students come into the pose while I kept falling out of it. The arch of my foot kept collapsing. I thought I would be never able to do it. But practice and all is coming! After years of training I am now starting to feel comfortable in balancing postures. And my feet feel and look better.
The higher you go up in the body, the lighter you want to become
In this article we zoom in on tree pose. This is one of the foundational balancing postures. In tree pose we want to have a strong foundation, just like a tree has strong roots and a trunk. The higher you go up in the body, the lighter you want to become. Just like a tree has branches and leaves that move.
Don't fix on the final posture
Don’t fix on the ‘final’ posture. Rather focus on a version of these postures where you can hold a steady deep breath. Yoga is about moving from body awareness, not from the mind. If you can’t keep your breathing calm, you’re probably going too deep into the posture.
What are the benefits
- Improves posture
- Strengthens legs
- Increases range of motion in hips
- Improves balance
- Improves focus and concentration
- Strengthens feet
Modifications
- If balancing on one foot is not an option, use a chair or a wall to support yourself with one hand placed on chair or wall
- With chronically injured knees or hips, be careful and stay in the first option given
- To spare injured shoulders keep hands in front of chest, like in the photo

Alignment cues
- Distribute weight evenly in the foot
- Gaze, find a focus point (dristi)
- Place hands against together in front of chest
- Slowly lift the right foot
- Place right heel on left ankle, toes point down. Stay here if you feel this is enough
- To go further in this posture, place whole right foot on left calf under the knee. Toes point down, knee is turning out
- If possible, try placing your whole right foot on the upper left thigh
- Tuck tailbone in so that tailbone points towards the floor
- Raise arms above head
- Let hands fall open to the sides
- Keep your shoulders and neck soft
- Stay here for 5-10 breaths
- Exhale and release the arms down in front of the chest
- Step back to Tadasana and repeat on other side
These are the common misalignments
- Placing foot on knee. This will put too much weight on the knee joint.
- Pointing standing foot out to compensate in hip mobility.
- Arched lower back, you want to have a neutral lower back as much as possible. Tell students to use their deep core muscles by using uddiyana bandha and tucking their tailbone in.
- Tell students to use their deep core muscles by using uddiyana bandha.
- Tense shoulders, neck and face. This is very common in balancing postures. (Beginner)Students often focus too much on getting into and staying in the posture. As a result they tense up. Tell your students to relax shoulders away from ears and focus on their breathing.


